# OpenCode Configuration
**Pay-as-you-go MiMo API** and **Token Plan** both support OpenCode. Refer to this guide for configuration and usage.
## Prerequisites
### Obtain Credentials
Supports two usage methods, but the corresponding credential acquisition methods are different:
| Usage Method |
Description |
Acquisition Method (BASE_URL and API Key below are examples) |
| Pay-as-you-go MiMo API |
Charged based on actual usage, suitable for light use |
- BASE_URL
- OpenAI Compatibility Protocol: `https://api.xiaomimimo.com/v1`
- Anthropic Compatibility Protocol: `https://api.xiaomimimo.com/anthropic`
- API Key
Go to [API Keys](https://platform.xiaomimimo.com/#/console/api-keys) to create an API Key |
| Token Plan |
Fixed subscription fee, with limited calls based on the package |
- BASE_URL
- OpenAI Compatibility Protocol: `https://token-plan-cn.xiaomimimo.com/v1`
- Anthropic Compatibility Protocol: `https://token-plan-cn.xiaomimimo.com/anthropic`
- API Key
After successful subscription, go to [Subscription](https://platform.xiaomimimo.com/#/console/plan-manage) to obtain the exclusive Base URL and API Key |
## Use OpenCode CLI
### Install OpenCode CLI
OpenCode supports two installation methods.
**Method 1: Official Script Installation (for macOS/Linux)**
```bash
curl -fsSL https://opencode.ai/install | bash
```
**Method 2: npm Installation**
Node.js 18 or later is required.
```bash
npm install -g opencode-ai
```
**Verify installation (if a version number is displayed, the installation was successful):**
```bash
opencode -v
```
### Configure Basic Settings
Edit or create the `opencode.json` configuration file at the following path:
- **macOS/Linux**: `~/.config/opencode/opencode.json`
- **Windows**: `User Directory\.config\opencode\opencode.json`
Copy the following content into the configuration file (replace `BASE_URL` and `MIMO_API_KEY` as needed):
```json
{
"$schema": "https://opencode.ai/config.json",
"provider": {
"mimo": {
"npm": "@ai-sdk/openai-compatible",
"name": "MiMo",
"options": {
"baseURL": "BASE_URL",
"apiKey": "MIMO_API_KEY"
},
"models": {
"mimo-v2.5-pro": {
"name": "mimo-v2.5-pro",
"limit": {
"context": 1048576,
"output": 131072
},
"modalities": {
"input": [
"text"
],
"output": [
"text"
]
}
}
}
}
}
}
```
**Note:** If you need to enable the image understanding capability, you need to modify or add the following configuration items under the configuration node of the model that supports this capability. That is, add `image` to the supported input modalities: `"modalities": {"input": ["text", "image"], "output": ["text"]}`
### Use OpenCode CLI
After completing the configuration, navigate to the project directory and run the following command to start OpenCode:
```bash
opencode
```
After starting, enter `/models` to view and switch between available models.
## Use OpenCode IDE Plugin
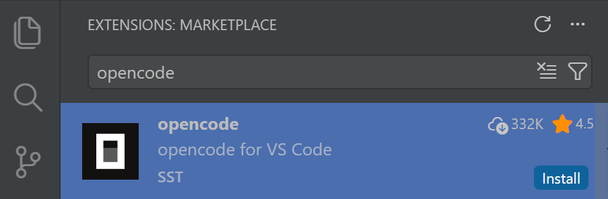
### Install Plugin
Search for and install the **opencode** plugin in the VS Code Extensions marketplace.
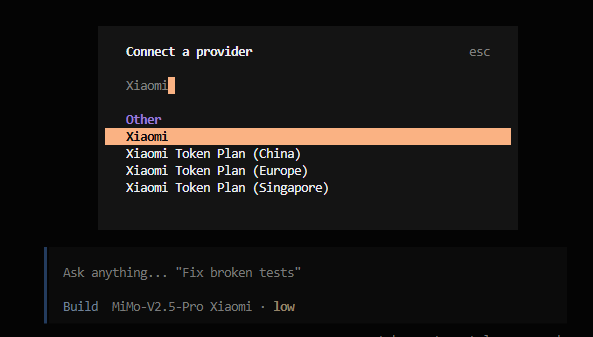
### Configure a Predefined Provider (Recommended)
Just enter `/connect` in the input box, search for `Xiaomi`, select the corresponding Provider, and fill in the API Key.
When using the **Xiaomi Token Plan**, you need to select the Provider corresponding to the Base URL displayed on the [Subscription](https://platform.xiaomimimo.com/#/console/plan-manage) page.
- `https://token-plan-cn.xiaomimimo.com/*`: Xiaomi Token Plan (China)
- `https://token-plan-sgp.xiaomimimo.com/*`: Xiaomi Token Plan (Singapore)
- `https://token-plan-ams.xiaomimimo.com/*`: Xiaomi Token Plan (Europe)
### Configure a Custom Provider
Refer to the "Configure Basic Settings" steps in the OpenCode CLI section above.
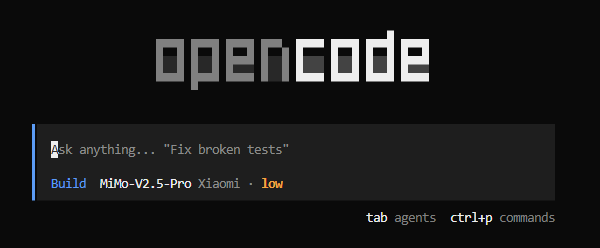
### Use OpenCode Plugin
## FAQ
### When verifying the installation on Windows, I encounter the following error. How to fix it?
> It seems that your package manager failed to install the right version of the opencode CLI for your platform. You can try manually installing "opencode-windows-x64" or "opencode-windows-x64-baseline" package
Run the command `npm install -g opencode-windows-x64` as prompted to resolve the issue.
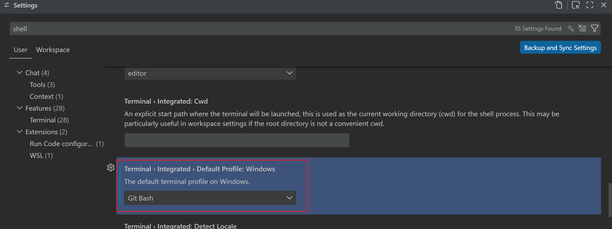
### Error when starting OpenCode in VS Code on Windows?
> opencode : Cannot load file ... because running scripts is disabled on this system
Change the default terminal type to Git Bash when opening a terminal in VS Code.