Hermes Agent Configuration
Pay-as-you-go MiMo API and Token Plan both support Hermes Agent. Refer to this guide for configuration and usage.
Prerequisites
Obtain Credentials
Supports two usage methods, but the corresponding credential acquisition methods are different:
| Usage Method | Description | Acquisition Method (BASE_URL and API Key below are examples) |
|---|---|---|
| Pay-as-you-go MiMo API | Charged based on actual usage, suitable for light use |
Go to API Keys to create an API Key |
| Token Plan | Fixed subscription fee, with limited calls based on the package |
After successful subscription, go to Subscription to obtain the exclusive Base URL and API Key |
Install Hermes Agent
Hermes Agent supports Linux, macOS, WSL2 (Windows), and more. For more information, refer to the Hermes Agent Official Documentation.
-
Linux / macOS: No additional steps required.
-
Windows: Refer to Install WSL to install WSL2, then run the commands below in WSL2.
Installation Command:
curl -fsSL https://raw.githubusercontent.com/NousResearch/hermes-agent/main/scripts/install.sh | bash
After installation, reload the terminal environment:
source ~/.bashrc # or source ~/.zshrc
Verify installation (if a version number is displayed, the installation was successful):
hermes --version
After installation, the following interface will appear:

Configure a Predefined Provider
1. Select Quick Setup
Choose Quick setup for initial configuration.
If not configured initially, you can re-enter the setup wizard via
hermes setup.

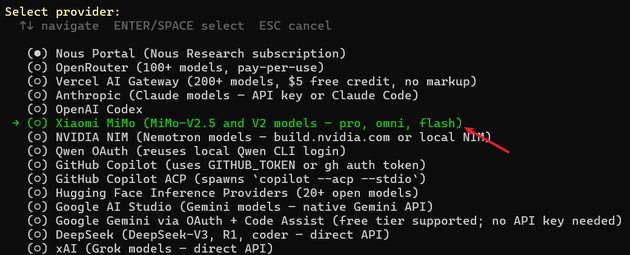
2. Select Provider Xiaomi MiMo
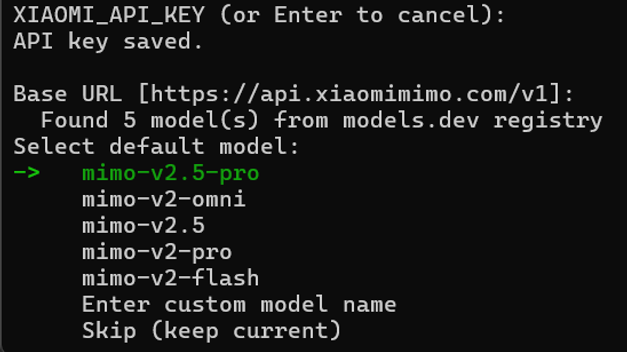
3. Fill in Configuration
Set API Key, Base URL, and default model as guided. The API Key and Base URL should be filled according to your credential type.
Follow the remaining steps as needed.
If you previously configured Pay-as-you-go MiMo API and need to switch to Token Plan:
- Method 1: Edit
~/.hermes/.envfile, replaceXIAOMI_API_KEYandXIAOMI_BASE_URLwith Token Plan credentials (open a new terminal after configuration). - Method 2: Use a custom provider for configuration.
4. After configuration, the following interface will appear:

Configure a Custom Provider
Configure Basic Settings
Replace BASE_URL and MIMO_API_KEY in the following methods with your actual credentials.
Method 1: Quick configuration via terminal commands
Here model.provider can only be set to custom. Custom names like xiaomi-coding will be invalid.
hermes config set model.provider custom
hermes config set model.base_url BASE_URL
hermes config set model.api_key MIMO_API_KEY
hermes config set model.default mimo-v2.5-pro
After configuration, you can view the settings in ~/.hermes/config.yaml.
Method 2: Manually edit configuration file
Edit ~/.hermes/config.yaml manually:
model:
  provider: custom
  base_url: BASE_URL
  api_key: MIMO_API_KEY
  default: mimo-v2.5-pro
Verify Configuration
After configuration, run the following command to verify:
hermes doctor
Use Hermes Agent
After configuration, run the following command to start:
hermes            # Classic CLI mode
hermes --tui      # Modern TUI mode