Kilo Code Configuration
Pay-as-you-go MiMo API and Token Plan both support Kilo Code. Refer to this guide for configuration and usage.
Prerequisites
Obtain Credentials
Supports two usage methods, but the corresponding credential acquisition methods are different:
| Usage Method | Description | Acquisition Method (BASE_URL and API Key below are examples) |
|---|---|---|
| Pay-as-you-go MiMo API | Charged based on actual usage, suitable for light use |
Go to API Keys to create an API Key |
| Token Plan | Fixed subscription fee, with limited calls based on the package |
After successful subscription, go to Subscription to obtain the exclusive Base URL and API Key |
Note: When Kilo Code uses MiMo under the Anthropic protocol, since the assistant containing tool calls is missing reasoning_content, the API will return a 400 error. For details, see [Important Notice]Passing Back reasoning_content in Multi-Turn Conversations for Agent Products .
Use Kilo Code CLI
Install Kilo Code CLI
Node.js 18 or later is required.
Installation command:
npm install -g @kilocode/cli
Verify installation (success if version number is displayed):
kilocode --version
Configure Basic Settings
Edit or create the config.json configuration file at the following paths:
-
macOS/Linux:
~/.config/kilo/config.json -
Windows:
User Directory\.config\kilo\config.json
Copy the following content into the configuration file (replace BASE_URL and MIMO_API_KEY as needed):
{
  "$schema": "https://kilo.ai/config.json",
  "disabled_providers": [],
  "provider": {
    "mimo": {
      "name": "MiMo",
      "npm": "@ai-sdk/openai-compatible",
      "models": {
        "mimo-v2.5-pro": {
          "name": "mimo-v2.5-pro",
          "options": {
            "thinking": {
              "type": "enabled"
            }
          }
        }
      },
      "options": {
        "apiKey": "MIMO_API_KEY",
        "baseURL": "BASE_URL"
      }
    }
  },
  "permission": {
    "bash": "allow"
  }
}
For more detailed configuration information, visit the Kilo Code CLI Official Documentation.
Use Kilo Code CLI
After completing the above configuration, open a new terminal and run the following command to start Kilo Code CLI:
kilocode
Once started, enter /models to switch models, and you can use MiMo models in Kilo Code CLI.
Use Kilo Code IDE Plugin
Install Plugin
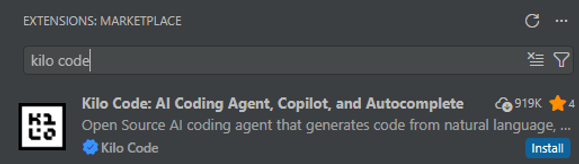
Search for and install the Kilo Code plugin in the VS Code Extensions marketplace.
Configure a Predefined Provider (Recommended)
Click Providers --> Show more providers, search for Xiaomi, select the corresponding Provider, and fill in the API Key.
When using the Xiaomi Token Plan, you need to select the Provider corresponding to the Base URL displayed on the Subscription page.
https://token-plan-cn.xiaomimimo.com/*: Xiaomi Token Plan (China)https://token-plan-sgp.xiaomimimo.com/*: Xiaomi Token Plan (Singapore)https://token-plan-ams.xiaomimimo.com/*: Xiaomi Token Plan (Europe)

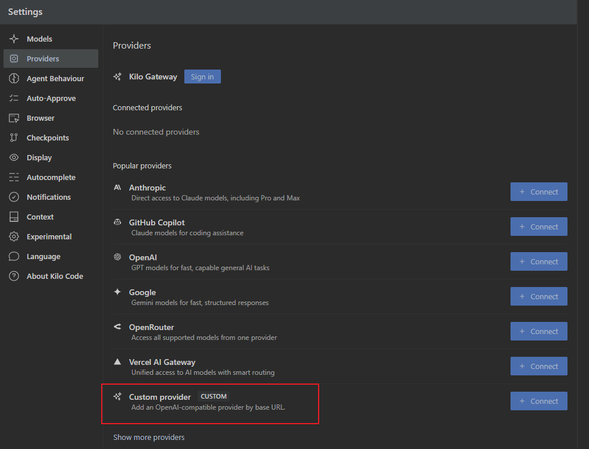
Configure a Custom Provider
Fill in the relevant information according to the following configuration.
1. Select Custom Provider
2. Fill in configuration details
-
Provider ID and Display name: Fill in as needed
-
Base URL: Enter the BASE_URL obtained from your usage method
-
API Key: Enter the API Key obtained from your usage method
-
Models: Add as needed, e.g.
mimo-v2.5-pro
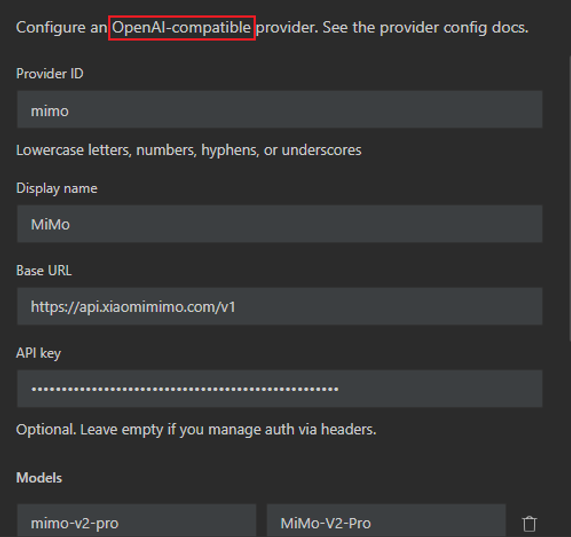
Other unmentioned parameters can be adjusted as needed.
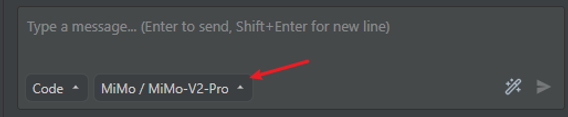
Use Kilo Code Plugin
After successful configuration, switch to the configured model and enter your requirements in the input box to start using.
FAQ
When verifying installation on Windows, I encounter the following error. How to resolve?
It seems that your package manager failed to install the right version of the Kilo CLI for your platform. You can try manually installing "@kilocode/cli-windows-x64" or "@kilocode/cli-windows-x64-baseline" package
Run the command npm install -g @kilocode/cli-windows-x64 as suggested to resolve the issue.